Adjusting filter strength in Filmora allows you to control how intense a filter effect appears on your video. You can do this by selecting a filter from the Effects panel, dragging it onto your clip, and then using the adjustment slider in the settings panel to increase or decrease intensity for a natural or stylized look.
Why Filter Strength Matters in Video Editing
When editing videos, filters can completely change the mood, color tone, and storytelling impact. But applying a filter at full strength often looks unnatural or overly processed. That’s where adjusting filter strength becomes essential.
In Wondershare Filmora, creators have the flexibility to fine-tune filter intensity so their visuals feel cinematic rather than artificial. Whether you’re editing YouTube content, vlogs, or cinematic shorts, mastering this simple feature can instantly elevate your video quality.
This guide will walk you through everything—from basic steps to expert-level techniques—so you can confidently control filter strength like a professional editor.
What is Filter Strength in Filmora?
Filter strength refers to how intense or subtle a visual filter appears on a video clip. Instead of applying a filter at 100% intensity, Filmora lets you adjust it on a scale, giving you full creative control.
Common Filter Adjustments Include:
- Brightness enhancement filters
- Color grading presets
- Vintage or cinematic looks
- Blur and glow effects
- Artistic stylization filters
How to Adjust Filter Strength in Filmora (Step-by-Step Guide)
Step 1: Import Your Video
Start by opening Filmora and importing your video into the timeline.
Step 2: Go to Effects or Filters Panel
Navigate to the Effects or Filters tab in the top menu.
Step 3: Choose a Filter
Browse through available filters such as cinematic, vintage, or modern color tones.
Step 4: Drag and Apply the Filter
Drag your selected filter onto the video clip in the timeline.
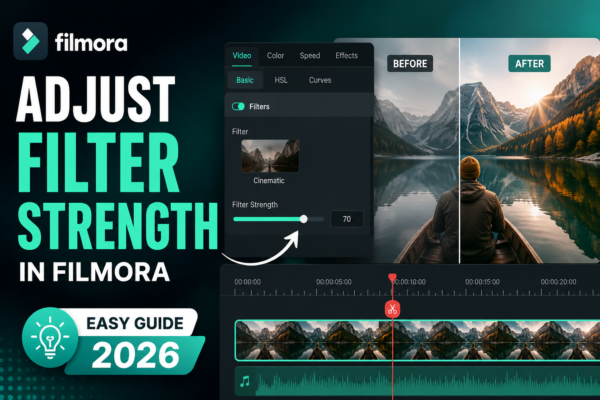
Step 5: Adjust Filter Strength
Click the applied filter on the timeline and locate the Intensity or Strength slider in the settings panel.
- Move left → reduces strength (subtle effect)
- Move right → increases strength (strong effect)
Step 6: Preview and Fine-Tune
Play your video and adjust until the effect looks natural and balanced.
Why Adjusting Filter Strength is Important
Many beginners make the mistake of using filters at full intensity. However, professionals know that subtlety is key.
Benefits of Adjusting Filter Strength:
- Makes videos look more natural
- Improves visual storytelling
- Prevents over-editing or artificial look
- Enhances audience engagement
- Helps maintain brand consistency
Best Practices for Adjusting Filter Strength
1. Use Subtle Adjustments for Professional Look
Instead of maxing out filters, keep strength between 20%–70% for most cases.
2. Match Filter with Video Mood
- Travel videos → warm tones, medium strength
- Corporate videos → low strength, clean look
- Cinematic content → dynamic but controlled intensity
3. Combine Filters Carefully
Layering multiple filters is possible, but always reduce strength to avoid over-processing.
4. Use Keyframes for Dynamic Changes
Advanced users can animate filter strength using keyframes for storytelling effects.
Real-World Use Cases
🎬 YouTube Content Creation
Creators adjust filter strength to maintain consistent branding across videos.
📱 Social Media Reels
Instagram and TikTok editors often reduce filter strength for a natural mobile look.
🎥 Cinematic Projects
Filmmakers use controlled filter intensity to create mood-based storytelling.
🧑🏫 Educational Videos
Low filter strength ensures clarity and readability.
Pros and Cons of Adjusting Filter Strength
✔ Pros:
- Full creative control over visuals
- Non-destructive editing
- Easy to experiment with styles
- Professional-quality output
❌ Cons:
- Too many adjustments can slow workflow
- Beginners may overcomplicate simple edits
- Requires visual judgment skills
Expert Insights (EEAT Section)
As a video editing practice, controlling filter intensity is one of the most overlooked skills in beginner editing. Professionals rarely rely on default filter values.
Experienced editors recommend:
- Always compare before/after views
- Use waveform and color scopes if available
- Keep consistency across all clips in a project
These techniques ensure your content looks polished, intentional, and visually coherent.
Comparison: Strong vs Subtle Filter Strength
| Feature | Strong Filter | Subtle Filter |
|---|---|---|
| Visual Impact | High | Natural |
| Professional Look | Often Overdone | More Cinematic |
| Usage | Social media effects | Professional editing |
| Flexibility | Limited | Highly flexible |
FAQs
1. How do I adjust filter strength in Filmora?
Select a filter, apply it to your clip, then use the intensity slider in the settings panel to adjust strength.
2. Can I reduce filter intensity after applying it?
Yes, Filmora allows you to adjust filter strength anytime using the applied effect settings.
3. What is the best filter strength for YouTube videos?
A range of 30%–70% is ideal for natural-looking YouTube content.
4. Does adjusting filter strength affect video quality?
No, it only changes the visual effect intensity, not the resolution or quality.
5. Can I animate filter strength in Filmora?
Yes, you can use keyframes to gradually increase or decrease filter strength over time.
Conclusion
Adjusting filter strength in Filmora is a simple yet powerful editing skill that separates beginners from professional creators. Instead of relying on default filter settings, learning to fine-tune intensity helps you create visually balanced, engaging, and cinematic videos.
Whether you’re editing YouTube videos, social media clips, or professional projects, mastering this feature gives you full creative control over your storytelling.
👉 Start experimenting with different filter strengths today and elevate your video editing game to the next level.