If you’ve ever spent hours applying the same effect or color correction to multiple clips in your video timeline, you already know how frustrating repetitive editing can be. That’s exactly where adjustment layers in Filmora become a game-changer.
Instead of editing each clip individually, adjustment layers let you apply effects across multiple clips at once—saving time, improving consistency, and making your workflow far more professional.
Let’s break it down in a simple, practical way so you can start using this powerful feature immediately.
Quick Answer (AEO Optimized)
Adjustment layers in Filmora are special overlay layers that allow you to apply effects, color grading, and visual changes to multiple clips simultaneously. Simply add an adjustment layer above your clips, apply effects to it, and all clips beneath it will inherit those changes—making editing faster and more efficient.
What Are Adjustment Layers in Filmora?
An adjustment layer in Filmora is a transparent layer placed above your video clips. Any effect you apply to this layer automatically affects all clips beneath it.
Think of it like this:
Instead of editing 10 clips individually, you edit one layer—and everything updates at once.
Why this matters:
- Saves time during editing
- Ensures consistent color grading
- Makes project changes easier later
Why Use Adjustment Layers? (Real-World Benefits)
1. Faster Editing Workflow
Imagine editing a YouTube vlog with 20 clips. Without adjustment layers, you’d apply filters 20 times. With them? Just once.
2. Consistent Look Across Clips
Perfect for:
- Cinematic color grading
- Brand-specific video styles
- Social media content consistency
3. Easy Experimentation
You can:
- Turn effects on/off quickly
- Test different looks without damaging original clips
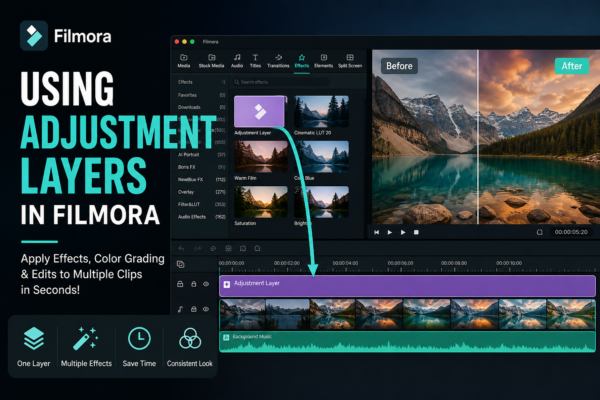
How to Use Adjustment Layers in Filmora (Step-by-Step)
1: Add an Adjustment Layer
- Go to the Effects panel
- Search for “Adjustment Layer”
- Drag it onto the timeline above your clips
2: Resize the Layer
- Stretch it across all clips you want to affect
3: Apply Effects
- Click the adjustment layer
- Add filters, LUTs, or color grading effects
4: Fine-Tune Settings
- Adjust brightness, contrast, saturation, etc.
- Changes apply to all clips underneath
Best Use Cases for Adjustment Layers
1. Color Grading Entire Videos
Apply a cinematic tone across your entire project without editing each clip.
2. Adding Filters to Multiple Clips
Perfect for:
- Instagram-style edits
- Travel vlogs
- Wedding videos
3. Creating Mood or Atmosphere
Example:
- Dark tones for dramatic scenes
- Warm tones for storytelling
4. Applying Effects to Specific Sections
You can use multiple adjustment layers for different parts of your timeline.
Adjustment Layers vs Direct Clip Editing
| Feature | Adjustment Layers | Clip-by-Clip Editing |
|---|---|---|
| Speed | Very fast | Time-consuming |
| Consistency | High | Can vary |
| Flexibility | Easy to change | Hard to update |
| Control | Global edits | Individual control |
When to use each:
- Use adjustment layers for overall edits
- Use clip editing for detailed adjustments
Pro Tips for Using Adjustment Layers Like an Expert
1. Stack Multiple Adjustment Layers
You can layer effects like:
- One for color grading
- One for brightness
- One for cinematic LUTs
2. Use Opacity for Subtle Effects
Reduce opacity for more natural results.
3. Combine with Keyframes
Animate effects over time for dynamic visuals.
4. Label Your Layers
Name them like:
- “Color Grade”
- “Brightness Fix”
- “Cinematic Look”
This keeps your timeline organized.
Common Mistakes to Avoid
- ❌ Applying too many effects (over-editing)
- ❌ Forgetting layer positioning (must be above clips)
- ❌ Ignoring opacity adjustments
- ❌ Not testing on different screens
FAQs
1. What is an adjustment layer in Filmora?
An adjustment layer is a transparent layer that applies effects to all clips beneath it, allowing bulk editing and consistent visuals.
2. Can I apply multiple effects using adjustment layers?
Yes, you can stack multiple effects on a single adjustment layer or use multiple layers for different effects.
3. Do adjustment layers affect video quality?
No, if used properly. However, excessive effects may impact rendering performance.
4. Can I use adjustment layers for specific clips only?
Yes, simply resize the adjustment layer to cover only the desired clips.
5. Are adjustment layers available in all Filmora versions?
They are available in newer versions of Filmora. Make sure your software is updated.
Final Thoughts: Why You Should Start Using Adjustment Layers Today
If you’re serious about improving your editing workflow in Filmora, adjustment layers are not optional—they’re essential.
They help you:
- Work faster
- Maintain consistency
- Experiment creatively
Whether you’re a beginner editing your first video or a content creator producing daily uploads, mastering adjustment layers will instantly level up your editing game.
Call to Action
Start your next project by using an adjustment layer—even for something simple like color correction. Once you see the time you save, you won’t go back to manual editing again.