Video editing often requires adjusting the size or orientation of clips to make them fit perfectly within your project. Whether you’re creating YouTube videos, social media reels, or tutorials, knowing how to resize and rotate video in Filmora can significantly improve your video quality and visual presentation.
Wondershare Filmora is one of the most beginner-friendly video editing tools that allows users to easily adjust video dimensions, rotate clips, and reposition footage without advanced technical skills.
In this guide, you’ll learn how to resize and rotate video clips in Filmora step by step, along with expert tips, practical use cases, and best practices for better video editing.
Quick Answer
To resize and rotate video clips in Filmora, import your video into the timeline, select the clip, and open the Transform settings in the editing panel. From there, you can adjust the Scale option to resize the video or use the Rotate controls to rotate the clip horizontally or vertically. This helps correct orientation, zoom footage, or fit videos to different screen formats.
What Does Resizing and Rotating a Video Clip Mean?
Before learning the steps, it’s important to understand what these editing actions do.
Video Resizing
Resizing a video means adjusting the scale or dimensions of the clip within the frame. You can:
• Zoom in on important details
• Fit videos into different aspect ratios
• Adjust clips for social media formats
• Remove unwanted edges
Video Rotation
Rotating a video changes its orientation or angle. This is useful when:
• A video is recorded sideways
• You need a creative angled shot
• Adjusting portrait and landscape clips
• Correcting camera alignment issues
In Filmora, both actions can be performed quickly using Transform controls or preview window adjustments.
How to Resize Video Clips in Filmora (Step-by-Step)
Follow these simple steps to resize your video in Filmora.
1. Import Your Video
Open Filmora and import your video file.
Steps:
- Launch Filmora.
- Click Import Media.
- Select the video file from your computer.
- Drag the video onto the timeline.
2. Select the Clip on the Timeline
Click the video clip you want to resize.
When selected, the clip will be highlighted and editing options will appear in the editing panel.
3. Open the Transform Settings
In the editing panel:
- Go to the Video tab.
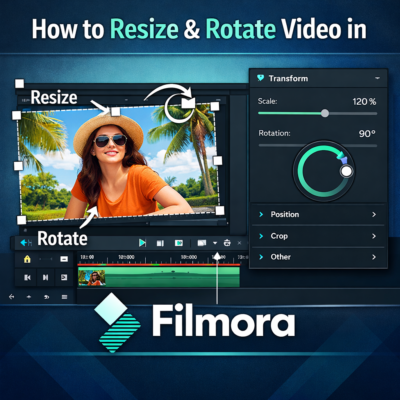
- Locate the Transform section.
- Find the Scale option.
4. Adjust the Scale Value
Increase or decrease the Scale percentage.
Example:
Scale 100% → Original size
Scale 120% → Zoomed in
Scale 80% → Smaller video
You can also resize visually by dragging the corner handles in the preview window.
5. Position the Video
After resizing, you can reposition the clip by dragging it in the preview window to align it perfectly within the frame.
How to Rotate Video Clips in Filmora
Sometimes videos are recorded sideways, especially when captured on smartphones. Filmora makes rotation extremely simple.
Method 1: Rotate Using Transform Settings
- Select the video clip on the timeline.
- Open the Video editing panel.
- Go to Transform.
- Adjust the Rotate slider.
Common rotation angles include:
90° – Rotate right
180° – Upside down
270° – Rotate left
Method 2: Rotate Directly in Preview Window
Filmora also allows rotation directly in the preview screen.
Steps:
- Click the clip in the timeline.
- Look for the rotation icon around the video frame.
- Drag the icon to rotate the video manually.
This method is great for creative angled shots.
Best Situations to Resize or Rotate Videos
Here are some real-world examples where resizing or rotating clips becomes necessary.
1. Fixing Smartphone Video Orientation
Many videos recorded on phones appear sideways. Rotation fixes this instantly.
2. Creating Social Media Content
Platforms like Instagram, TikTok, and YouTube Shorts require different video sizes.
Resizing helps adjust footage for:
• Vertical videos
• Square videos
• Widescreen videos
3. Highlighting Important Details
Resizing allows editors to zoom into key parts of a video.
Example: A tutorial may zoom into the screen area to highlight instructions.
4. Creating Split Screen Effects
Reducing clip size allows multiple videos to appear simultaneously.
Filmora Resize vs Crop vs Zoom (Comparison)
Many beginners confuse these three editing actions.
Resize
Changes video scale to fit within the frame.
Crop
Removes unwanted edges or sections of a video.
Zoom
Magnifies a specific part of a video to highlight details.
Filmora combines these tools to give complete control over video framing.
Pro Tips for Resizing and Rotating Videos in Filmora
Professional editors follow certain best practices to maintain video quality.
1. Avoid Over-Zooming
Increasing scale too much can reduce video quality.
Tip: Stay below 150–170% scale when possible.
2. Maintain Aspect Ratio
If resizing for platforms like YouTube, maintain the correct aspect ratio.
16:9 – YouTube videos
9:16 – TikTok / Shorts
1:1 – Instagram posts
3. Use Keyframes for Dynamic Movement
Filmora allows keyframe animation to gradually resize or rotate clips.
Example:
Start at 100%
Zoom to 130% over 5 seconds
This creates a cinematic zoom effect.
4. Combine with Crop Tool
Sometimes resizing alone is not enough.
Cropping removes unnecessary edges while resizing improves framing.
Common Mistakes Beginners Make
Avoid these frequent editing errors.
- Rotating the entire project instead of the clip.
Always rotate the selected clip, not the project settings. - Resizing without repositioning.
After resizing, adjust clip placement to keep the subject centered. - Ignoring resolution.
Zooming too much can reduce clarity.
FAQ (Frequently Asked Questions)
How do I resize a video in Filmora?
To resize a video in Filmora:
- Import the video.
- Drag it to the timeline.
- Select the clip.
- Open Transform settings.
- Adjust the Scale value.
You can also resize using the corner handles in the preview window.
Can I rotate videos 90 degrees in Filmora?
Yes. Filmora allows users to rotate clips 90°, 180°, or 270° using the Transform rotation control in the video editing panel.
Will resizing reduce video quality?
Resizing slightly usually maintains quality. However, excessive zooming above 150–200% may cause pixelation if the original video resolution is low.
How do I rotate a vertical video to horizontal in Filmora?
To rotate a vertical video:
- Select the clip.
- Open Transform settings.
- Set rotation to 90° or 270°.
- Resize and reposition to fit the frame.
Can I animate resizing or rotation in Filmora?
Yes. Filmora supports keyframe animation, allowing you to gradually resize or rotate clips over time to create smooth cinematic transitions.
Conclusion
Learning how to resize and rotate video in Filmora is one of the most essential skills for beginner video editors. These simple editing techniques allow you to correct video orientation, fit clips into different formats, and enhance visual storytelling.
Filmora’s intuitive interface makes it easy to adjust video scale, rotate clips, and reposition footage with just a few clicks. By combining resizing with other tools like cropping, keyframes, and aspect ratio adjustments, you can create professional-looking videos for YouTube, social media, or personal projects.
If you’re new to Filmora, mastering these basic editing techniques will help you improve video quality and editing efficiency significantly.
Start experimenting with resizing and rotation today, and your videos will instantly look more polished and professional.