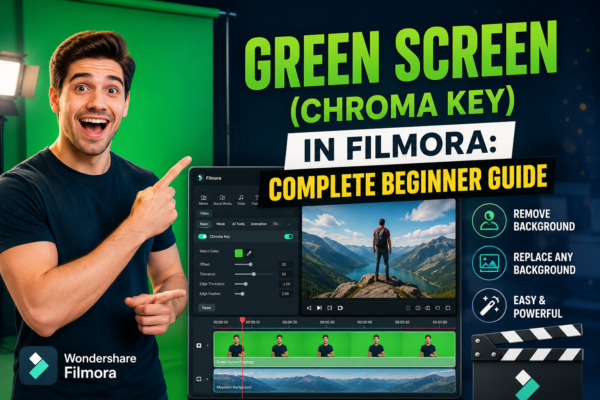
Green screen editing has become a game-changer for video creators, YouTubers, and marketers who want to produce cinematic-quality visuals without expensive setups. Whether you’re replacing backgrounds, creating travel illusions, or building professional explainer videos, chroma key technology makes it possible.
One of the most beginner-friendly tools for this is Wondershare Filmora, which includes a built-in chroma key feature designed for fast and clean background removal.
In this guide, you’ll learn exactly how to use green screen in Filmora, fix common issues, and achieve professional-looking results even if you’re a complete beginner.
What is Green Screen in Filmora?
Green screen in Filmora is a chroma key feature that removes a solid-colored background (usually green) from a video and replaces it with another image or video. It is widely used in YouTube videos, films, and marketing content to create professional visual effects without advanced editing skills.
What is Chroma Key in Filmora?
Chroma key (green screen effect) is a video editing technique that isolates and removes a specific color—typically green or blue—from footage. In Wondershare Filmora, this feature is simple to use and doesn’t require advanced motion graphics knowledge.
How it works:
- You film a subject in front of a green background
- Filmora detects and removes the green color
- You replace it with any image, video, or animation
This technique is widely used in:
- YouTube tutorials
- Gaming content
- Movie effects
- Virtual presentations
- Marketing videos
How to Use Green Screen in Filmora (Step-by-Step)
Using green screen in Filmora is straightforward if you follow the correct workflow.
1: Import Your Media
- Open Wondershare Filmora
- Import your green screen video and background media
- Drag both files into the timeline
2: Place Your Clips Correctly
- Put the background clip on the first video track
- Place the green screen video above it
3: Apply Chroma Key
- Double-click the green screen clip
- Go to Video Settings > AI Tools or Chroma Key
- Enable Chroma Key option
4: Remove Green Background
- Use the color picker tool
- Select the green area in your video
- Adjust:
- Tolerance
- Edge thickness
- Spill removal
5: Fine-Tune the Result
- Remove green shadows
- Smooth edges
- Adjust opacity if needed
6: Export Your Video
- Export in HD or 4K depending on your project
- Choose MP4 format for best compatibility
Best Settings for Clean Green Screen in Filmora
To achieve professional results, settings matter more than people think.
Recommended adjustments:
- Tolerance: Medium (avoid over-removal)
- Edge Feather: 10–30 for smooth blending
- Spill Reduction: High if green reflection appears
- Lighting Correction: Always enable if available
Pro Tip:
Even the best chroma key tools struggle with poor lighting. Always ensure your green screen is evenly lit before recording.
Common Problems & Fixes
1. Green edges still visible
- Increase spill removal
- Adjust tolerance slightly higher
2. Subject looks cut out or damaged
- Reduce tolerance
- Improve original video lighting
3. Background flickering
- Stabilize footage before applying chroma key
- Use higher-quality recording settings
Real-World Use Cases of Green Screen in Filmora
Green screen editing is not just for movies—it’s widely used in everyday content creation.
1. YouTube Content Creation
Creators replace backgrounds with:
- Gaming visuals
- Animated scenes
- Branding overlays
2. Online Teaching
Teachers use chroma key to:
- Replace home backgrounds with slides
- Create virtual classrooms
3. Marketing Videos
Businesses use it for:
- Product demonstrations
- Promotional storytelling
4. Social Media Content
Influencers create engaging reels with:
- Dynamic environments
- Travel illusions
Filmora Green Screen vs Professional Tools
| Feature | Filmora | Advanced Tools (After Effects) |
|---|---|---|
| Ease of use | Very easy | Complex |
| Speed | Fast editing | Slower workflow |
| Learning curve | Beginner-friendly | Advanced |
| Output quality | High | Very high |
For most creators, Wondershare Filmora offers the perfect balance between simplicity and quality.
Tips for Professional Green Screen Editing
To make your chroma key results look cinematic:
- Use uniform lighting on the green background
- Avoid wrinkles in the screen
- Keep subject 3–5 feet away from background
- Use high-resolution footage (1080p or 4K)
- Avoid wearing green clothing
These small details dramatically improve output quality.
FAQ: Green Screen (Chroma Key) in Filmora
1. What is green screen in Filmora used for?
Green screen in Filmora is used to remove backgrounds from videos and replace them with custom images or videos for creative effects.
2. Is Filmora good for chroma key editing?
Yes, Wondershare Filmora is beginner-friendly and provides an easy chroma key tool with decent professional results.
3. Why is my green screen not working properly in Filmora?
This usually happens due to poor lighting, incorrect tolerance settings, or wrinkles in the green screen background.
4. Can I use blue screen instead of green screen in Filmora?
Yes, Filmora supports both green and blue screens depending on your shooting setup.
5. What is the best format to export green screen videos?
MP4 (H.264 codec) is the best format for high-quality and widely compatible exports.
Conclusion
Green screen editing in Filmora opens the door to professional-level video production without complex software. With the chroma key feature in Wondershare Filmora, even beginners can create cinematic effects, engaging YouTube videos, and polished marketing content.
If you focus on proper lighting, correct settings, and clean editing techniques, your results can look surprisingly professional.
Now it’s your turn—start experimenting with green screen editing and turn simple footage into creative visual stories that stand out.











