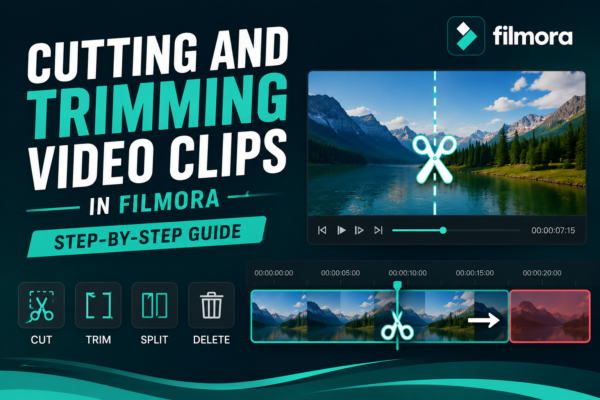
If you’ve ever watched a polished YouTube video, Instagram reel, or tutorial and wondered why it feels so smooth, the secret is simple: precise cutting and trimming.
Raw footage is almost never perfect. There are pauses, mistakes, unnecessary parts, and awkward transitions. That’s where cutting and trimming video clips in Filmora becomes essential https://filmora.wondershare.com/guide/trim-split-cut.html
Wondershare Filmora is one of the most beginner-friendly video editing tools that allows creators to quickly remove unwanted parts and shape professional-looking videos without complex editing skills.
In this guide, you’ll learn:
- How to cut and trim clips step-by-step
- Real editing scenarios
- Pro tips used by creators
- Common mistakes to avoid
- FAQs for quick understanding
Whether you’re a YouTuber, student, freelancer, or content creator, this guide will help you edit faster and smarter.
Quick Answer: How to Cut and Trim Videos in Filmora?
Cutting and trimming video clips in Filmora is done using the timeline tools. You import your video, drag it to the timeline, and use the split or trim feature to remove unwanted sections. Simply position the playhead, click “Split,” and delete unnecessary parts or drag clip edges to shorten duration.
What is Cutting and Trimming in Filmora?
Before jumping into steps, let’s clarify the basics:
✂️ Cutting
Cutting means splitting a video into multiple parts so you can remove or rearrange sections.
✂️ Trimming
Trimming means shortening a video clip from the start or end without splitting it.
Why it matters:
- Removes mistakes or pauses
- Improves storytelling flow
- Makes videos more engaging
- Reduces unnecessary length
In short, cutting = divide, trimming = shorten.
How to Cut Video Clips in Filmora (Step-by-Step)
Follow these simple steps to cut clips like a pro:
Step 1: Import Your Video
- Open Filmora
- Click “Import Media”
- Select your video file
- Drag it to the timeline
Step 2: Position the Playhead
Move the timeline playhead to where you want to cut.
Step 3: Use the Split Tool
- Click the “Scissors” icon
- Or press Ctrl + B (Windows) / Command + B (Mac)
This instantly splits your clip.
Step 4: Delete Unwanted Parts
- Select the unwanted section
- Press Delete
- Or right-click and remove
Step 5: Rearrange Clips
Drag remaining clips to adjust flow.
Pro Tip:
Use multiple cuts to remove:
- Silent pauses
- Mistakes
- Extra breathing space in talking videos
This makes your content feel more professional and dynamic.
How to Trim Video Clips in Filmora
Trimming is even easier than cutting.
Method 1: Drag Edge Trimming
- Hover over the start or end of a clip
- Drag inward to shorten it
Method 2: Precision Trimming
- Zoom into timeline
- Adjust frame-by-frame
- Get exact timing control
When to use trimming:
- Removing intro/outro delays
- Shortening long clips
- Fixing timing issues
Cutting vs Trimming: Key Differences
| Feature | Cutting | Trimming |
|---|---|---|
| Action | Splits clip | Shortens clip |
| Control | High (multiple parts) | Medium (edges only) |
| Use case | Editing structure | Refining length |
Both are essential in cutting and trimming video clips in Filmora for professional editing.
Real-World Use Cases (Why Editors Use This)
🎬 YouTube Videos
Remove mistakes, pauses, and filler words.
📱 Social Media Reels
Keep only engaging moments.
🎓 Educational Videos
Remove repetition and long explanations.
💼 Business Presentations
Make content clean and professional.
Expert Editing Tips
As a video editing workflow principle, professionals follow these habits:
✔️ 1. Edit in Layers
First cut rough sections, then refine trimming.
✔️ 2. Avoid Overcutting
Too many cuts can make videos feel jumpy.
✔️ 3. Use Zoom on Timeline
Precision matters for clean edits.
✔️ 4. Preview After Every Edit
Always check flow after trimming.
✔️ 5. Keep Story Flow Intact
Don’t remove context that affects understanding.
These practices are widely used in industry-level editing workflows.
Common Mistakes Beginners Make
❌ Cutting randomly without planning
❌ Over-trimming important content
❌ Ignoring audio flow after edits
❌ Not previewing final result
❌ Leaving awkward transitions
Avoiding these mistakes will immediately improve your editing quality.
Advanced Tip: Keyboard Shortcuts in Filmora
Speed up your workflow:
- Ctrl + B → Split clip
- Delete → Remove clip
- Spacebar → Play/Pause preview
- Ctrl + Z → Undo mistake
Using shortcuts makes cutting and trimming video clips in Filmora much faster and professional.
Use Case Comparison: Beginner vs Pro Editing
Beginner Workflow:
- Basic cuts
- Simple trimming
- Minimal timeline editing
Pro Workflow:
- Multi-layer cutting
- Precision trimming
- Audio syncing with cuts
- Story-based editing structure
Cutting and trimming video clips in Filmora becomes more powerful as your editing skill grows.
FAQ: Cutting and Trimming Video Clips in Filmora
1. What is the easiest way to cut clips in Filmora?
The easiest way is using the Split tool or pressing Ctrl + B on the timeline.
2. Can I undo a cut in Filmora?
Yes, press Ctrl + Z to undo any cut or edit instantly.
3. Is trimming the same as cutting in Filmora?
No. Cutting splits the video, while trimming shortens clip edges.
4. Do cuts affect video quality?
No, cutting does not reduce video quality in Filmora.
5. Can I cut multiple clips at once?
Yes, you can select multiple clips and split them together on the timeline.
Conclusion: Master Editing with Simple Cutting & Trimming
Learning cutting and trimming video clips in Filmora is one of the most important skills for any video creator. It’s the foundation of clean storytelling, professional pacing, and engaging content.
Once you master these basics, you can move on to advanced editing like transitions, effects, and motion graphics.
If you consistently practice these techniques in Wondershare Filmora, your editing speed and quality will improve significantly.











