But here’s the truth: your first project is not about perfection; it’s about understanding the workflow.
In this guide, you’ll learn creating your first project in Filmora step by step, from opening the software to exporting your final video. By the end, you’ll confidently start editing like a professional content creator.
Quick Answer
What is creating your first project in Filmora?
It is the process of starting a new video editing workspace in Filmora, importing media files, arranging clips on the timeline, applying basic edits, and exporting the final video. It helps beginners understand the Filmora workflow step-by-step.
What Does a “Project” Mean in Filmora?
Before we jump into creating your first project in Filmora, let’s understand the concept.
A project in Filmora is a workspace where you:
- Import videos, images, and audio
- Edit and arrange clips on a timeline
- Add transitions, effects, and text
- Export the final video file
Think of it like a digital workspace where your entire video is built from scratch.
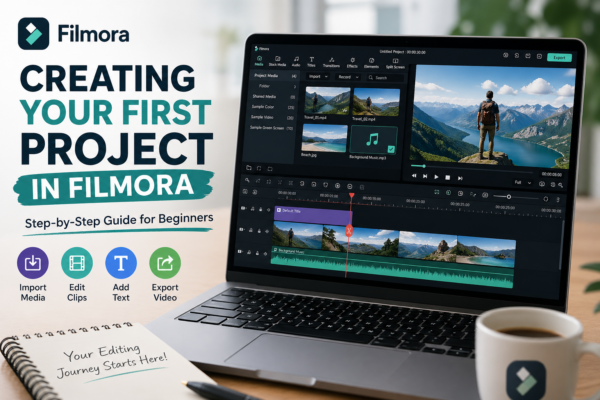
Step-by-Step Guide to Creating Your First Project in Filmora
Let’s break down creating your first project in Filmora into simple, beginner-friendly steps.
Step 1 – Open Filmora and Start a New Project
- Launch Filmora on your computer
- Click “New Project” on the homepage
- Choose aspect ratio (16:9 for YouTube, 9:16 for Shorts/Reels)
💡 Tip: Always select the correct aspect ratio before editing to avoid cropping issues later.
Step 2 – Import Your Media Files
To start building your project:
- Click Import Media
- Select videos, photos, or music from your device
- Drag files into the Media Library
Common media types:
- MP4 video files
- JPG/PNG images
- MP3 audio files
Step 3 – Drag Clips to the Timeline
Now comes the real editing area.
- Drag your video onto the timeline
- Arrange clips in the correct order
- Trim unwanted sections using the cut tool
🎬 This is the foundation of creating your first project in Filmora.
Step 4 – Add Basic Edits
Start enhancing your video using simple tools:
✂️ Trimming
Remove unnecessary parts of clips.
🎨 Transitions
Add smooth scene changes between clips.
📝 Text & Titles
Insert titles, captions, or subtitles.
🎵 Background Music
Add audio tracks to make your video engaging.
Step 5 – Apply Effects (Optional but Powerful)
Filmora provides creative tools like:
- Filters (cinematic looks)
- Motion effects
- Color correction tools
👉 Use effects lightly as a beginner to avoid over-editing.
Step 6 – Preview Your Project
Always preview before exporting:
- Click Play
- Check transitions, timing, and audio sync
- Fix errors if needed
This step ensures your creating your first project in Filmora process is smooth and error-free.
Step 7 – Export Your Final Video
Once everything is ready:
- Click Export
- Choose format (MP4 recommended)
- Select resolution (1080p for YouTube)
- Save to your device
🎉 Congratulations—you’ve completed your first Filmora project!
Real-World Example of a First Filmora Project
Let’s say you want to create a travel vlog:
- Import vacation clips
- Arrange them in timeline
- Add upbeat background music
- Insert titles like “My Dubai Trip”
- Apply smooth transitions
- Export in 1080p
This simple workflow is exactly what beginners follow when creating your first project in Filmora.
Pro Tips for Beginners Using Filmora
Here are expert insights to improve your editing:
✔ Keep it simple
Don’t overload your video with effects.
✔ Organize media
Rename files before importing.
✔ Save frequently
Avoid losing progress due to crashes.
✔ Learn shortcuts
Speed up editing workflow.
✔ Use templates
Filmora offers ready-made templates for faster editing.
Common Mistakes to Avoid
While creating your first project in Filmora, beginners often:
- Import low-quality videos
- Overuse transitions
- Ignore audio balance
- Export in wrong resolution
- Skip timeline organization
Avoiding these mistakes will instantly improve your editing quality.
Pros and Cons of Filmora for Beginners
✔ Pros
- Easy-to-use interface
- Drag-and-drop editing
- Built-in effects and music
- Beginner-friendly learning curve
❌ Cons
- Limited advanced controls compared to professional tools
- Watermark in free version
- Requires paid plan for full features
Best Use Cases for Filmora Projects
You can use Filmora for:
- YouTube videos
- Social media reels
- Educational content
- Marketing videos
- Travel vlogs
It’s especially powerful for beginners learning video editing fundamentals.
FAQs – Creating Your First Project in Filmora
1. What is the first step in Filmora?
The first step is opening Filmora and clicking “New Project” to start a blank editing workspace.
2. Do I need experience to use Filmora?
No, Filmora is designed for beginners with a simple drag-and-drop interface.
3. What format should I export my Filmora project in?
MP4 is the most recommended format for YouTube and social media platforms.
4. Can I use Filmora for free?
Yes, but the free version adds a watermark and limits some features.
5. How long does it take to learn Filmora basics?
Most beginners can learn the basics of creating your first project in Filmora within 1–2 days of practice.
Conclusion: Start Your Editing Journey Today
Creating your first project in Filmora is more than just a technical step—it’s your entry into the world of video storytelling. Once you understand the workflow, everything becomes easier: importing media, editing clips, adding effects, and exporting polished videos.
The key is simple: start small, practice consistently, and improve with each project.
If you’re ready, open Filmora today and build your first video. Your editing journey starts now.