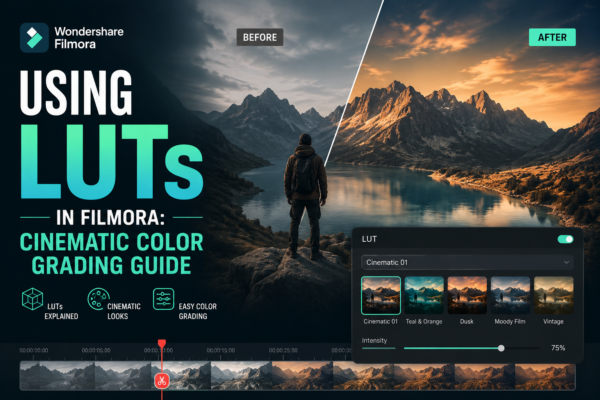
Ever watched a cinematic YouTube video or short film and wondered why it looks so polished, warm, or film-like—even if it was shot on a basic camera?
The secret is often color grading using LUTs (Lookup Tables).
If you’re editing in Filmora, you already have access to powerful built-in LUT tools that can instantly transform dull footage into cinematic visuals. But here’s the catch: most beginners either overuse LUTs or apply them incorrectly, ruining the natural look of their video.
In this guide, you’ll learn exactly how to use LUTs in Filmora, when to use them, and how professionals combine them with smart editing workflows for stunning results.
Quick Answer
What are LUTs in Filmora?
LUTs (Lookup Tables) in Filmora are preset color profiles that instantly change the color tone, contrast, and mood of your video. They are used to achieve cinematic looks, correct colors, or create stylized visual effects with one click.
How do you use LUTs in Filmora?
- Import your video into Filmora
- Go to the Color > 3D LUT section
- Select a LUT preset
- Adjust intensity or opacity
- Fine-tune exposure, contrast, and saturation
What Are LUTs in Video Editing?
LUT stands for Lookup Table, a mathematical formula that maps one color space to another.
In simple terms:
- It transforms flat footage into stylized visuals
- It can mimic film stock, cinematic tones, or creative color styles
- It helps maintain consistency across multiple clips
In Filmora, LUTs are integrated into the color grading panel, making them beginner-friendly yet powerful enough for advanced editors.
Why Use LUTs in Filmora? (Benefits Explained)
Using LUTs in Filmora gives creators a fast and efficient way to enhance visuals without manual color correction.
Key Benefits
- 🎬 Instant cinematic transformation
- 🎨 Consistent color grading across clips
- ⚡ Saves time compared to manual grading
- 📱 Ideal for YouTube, reels, and short films
- 🎥 Enhances storytelling mood and tone
Real-World Example
Imagine you shot a travel vlog on your phone. The footage looks flat and dull. With LUTs in Filmora, you can apply:
- Teal & Orange LUT → cinematic travel vibe
- Warm LUT → sunset storytelling feel
- Moody LUT → documentary-style atmosphere
How to Use LUTs in Filmora (Step-by-Step Guide)
Here’s a simple workflow to apply LUTs correctly in Filmora video editing software.
Step 1: Import Your Footage
Open Filmora and import your video clips into the timeline.
Step 2: Access Color Settings
Go to:
- Color Tab
- Select 3D LUT or LUT Presets
Step 3: Choose a LUT Preset
Filmora offers built-in LUT styles like:
- Cinematic LUTs
- Vintage LUTs
- Travel LUTs
- Black & White LUTs
Step 4: Apply and Preview
Click on a LUT and preview changes in real-time.
Step 5: Adjust Intensity
Reduce or increase LUT strength to avoid over-processing.
Step 6: Fine-Tune Color
Adjust:
- Exposure
- Contrast
- Saturation
- White balance
This ensures your footage still looks natural and not overly filtered.
Best Practices for Using LUTs in Filmora
Even though LUTs are powerful, using them incorrectly can ruin your video quality.
Pro Editing Tips
- Always start with color-corrected footage first
- Use LUTs as a base style, not a final fix
- Reduce LUT intensity to 30–70% for natural results
- Match LUT style with video mood
- Avoid stacking multiple LUTs
Common Mistake to Avoid
Many beginners apply LUTs directly on raw footage without correction, which leads to:
- Overexposed highlights
- Loss of skin tone accuracy
- Unrealistic color grading
Types of LUTs You Can Use in Filmora
Understanding LUT types helps you choose the right one for your project.
1. Cinematic LUTs
- Teal & Orange tones
- Used in films and trailers
- Best for storytelling videos
2. Travel LUTs
- Bright and vibrant colors
- Perfect for vlogs and outdoor footage
3. Moody LUTs
- Dark shadows, low saturation
- Ideal for documentaries and emotional scenes
4. Vintage LUTs
- Film grain style
- Retro aesthetic for nostalgic content
5. Black & White LUTs
- High contrast monochrome look
- Used for dramatic storytelling
LUTs vs Manual Color Grading in Filmora
| Feature | LUTs | Manual Color Grading |
|---|---|---|
| Speed | Fast | Slow |
| Control | Limited | Full control |
| Learning curve | Easy | Advanced |
| Best for | Beginners & creators | Professionals |
👉 Best workflow: Use LUTs first, then refine manually.
Use Cases of LUTs in Filmora
YouTube Videos
Creators use LUTs to maintain consistent branding and cinematic quality.
Short Films
Helps set emotional tone and storytelling depth.
Travel Vlogs
Enhances landscapes, skies, and natural lighting.
Social Media Content
Instagram reels and TikTok videos look more engaging with LUTs.
Expert Insights
Professional video editors recommend using LUTs as a creative starting point, not a final output.
Most industry workflows (Adobe Premiere Pro, DaVinci Resolve, Filmora) follow this pattern:
- Basic correction
- LUT application
- Manual refinement
According to Wondershare Filmora documentation, LUTs are designed to simplify cinematic color grading for creators who don’t want complex professional tools.
You can also visit
- https://filmora.wondershare.com (official Filmora guide)
- https://www.adobe.com/creativecloud/video/discover/lut.html (LUT explanation in professional editing)
Pros and Cons of Using LUTs in Filmora
Pros
- Fast workflow
- Beginner-friendly
- Professional cinematic results
- Wide variety of styles
Cons
- Limited customization compared to manual grading
- Can look unnatural if overused
- Not suitable for every lighting condition
FAQ: Using LUTs in Filmora
1. What is the purpose of LUTs in Filmora?
LUTs are used to quickly apply cinematic color styles, correct colors, and enhance video mood without manual grading.
2. Are LUTs in Filmora free?
Yes, Filmora includes built-in LUTs, and you can also import custom LUTs (.cube files).
3. Can I create my own LUT in Filmora?
Filmora does not fully support LUT creation, but you can export graded settings or use external tools like DaVinci Resolve.
4. Do LUTs reduce video quality?
No, LUTs do not reduce quality, but improper use can distort colors and exposure.
5. What is the best LUT for cinematic videos?
Teal & Orange LUTs are widely used for cinematic storytelling due to their film-like contrast and skin tone balance.
Conclusion
Using LUTs in Filmora is one of the easiest ways to elevate your video editing game from basic to cinematic. Whether you’re editing YouTube content, travel vlogs, or short films, LUTs help you achieve professional color grading in just a few clicks.
However, the real magic happens when you combine LUTs with manual adjustments and a strong visual storytelling mindset.
If you want your videos to stand out in a crowded digital world, mastering LUTs in Filmora is a skill worth learning.











