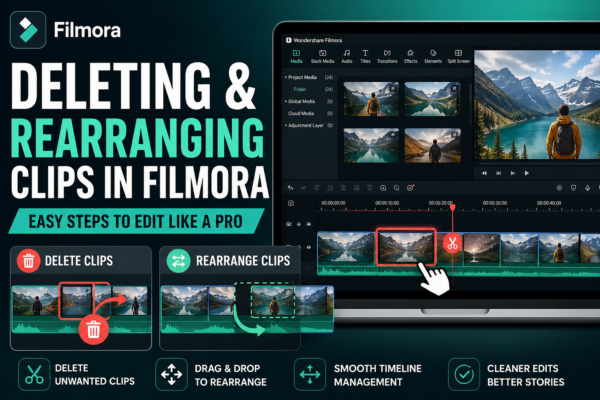
Video editing becomes truly powerful when you know how to control your timeline. Whether you’re fixing mistakes, refining storytelling, or restructuring a video, mastering deleting and rearranging clips in Filmora is a core skill every editor must learn.
If you’ve ever felt stuck trying to clean up your timeline or make your video flow better, this guide will help you take full control using simple, practical steps inside Wondershare Filmora.
Quick Answer
Deleting and rearranging clips in Filmora means removing unwanted video segments and shifting clips on the timeline to improve storytelling. You can delete clips using the delete key or right-click menu, and rearrange them by dragging and dropping on the timeline. This helps create smooth, professional-looking videos quickly.
What Does Deleting and Rearranging Clips in Filmora Mean?
In simple terms, editing videos is like assembling puzzle pieces. Each clip represents a moment, and your job is to place them in the right order—or remove the ones that don’t fit.
- Deleting clips removes unwanted footage such as mistakes, pauses, or irrelevant scenes
- Rearranging clips changes the order of video segments to improve storytelling flow
This process is essential in building clean, engaging, and professional video content.
Why Deleting and Rearranging Clips Matters in Video Editing
Many beginners underestimate this step, but it is one of the most important parts of editing.
Key Benefits:
- Improves storytelling flow
- Removes unnecessary or boring content
- Enhances viewer engagement
- Helps create professional-quality videos
- Makes your content more structured and clear
Think of it like editing a written article—you don’t just write, you refine.
How to Delete Clips in Filmora (Step-by-Step Guide)
Deleting clips in Filmora is simple, but doing it correctly ensures you don’t mess up your timeline.
1 – Using the Delete Key
- Select the clip on the timeline
- Press the Delete key on your keyboard
- The clip is instantly removed
2 – Right-Click Option
- Right-click on the clip
- Choose Delete from the menu
- Confirm removal
3 – Ripple Delete (Advanced)
- Removes the clip AND closes the gap automatically
- Useful for maintaining smooth timeline flow
💡 Pro Tip: Always use ripple delete when working on long videos to avoid empty gaps.
How to Rearrange Clips in Filmora Like a Pro
Rearranging clips is where storytelling magic happens. This is how you control the viewer’s experience.
Basic Drag-and-Drop Method
- Click and hold a clip
- Drag it to a new position on the timeline
- Release to place it
Using Timeline Snapping
- Filmora automatically aligns clips
- Helps prevent overlap or spacing errors
Advanced Rearrangement Strategy
- Cut long clips into smaller sections
- Move segments individually for better storytelling
- Use transitions between rearranged clips
Common Mistakes Beginners Make
Even simple tasks like deleting and rearranging clips in Filmora can go wrong if you’re not careful.
Mistakes to Avoid:
- Leaving empty gaps after deleting clips
- Overlapping clips unintentionally
- Random rearrangement without planning story flow
- Not previewing edits before final export
👉 Always preview your timeline after making changes.
Pro Tips for Better Timeline Editing
If you want to edit like a professional, follow these expert techniques:
✔ Plan Before Editing
Create a rough structure before arranging clips.
✔ Use Short Clips
Shorter clips are easier to rearrange and manage.
✔ Keep Story Flow in Mind
Don’t just move clips randomly—think like a storyteller.
✔ Zoom Into Timeline
Helps with precision editing.
✔ Use Markers
Mark important sections before rearranging.
Use Cases of Deleting and Rearranging Clips in Filmora
This technique is widely used in different video editing scenarios:
🎬 YouTube Videos
- Remove pauses, mistakes, and filler content
- Rearrange intro, body, and outro for better engagement
🎥 Vlogs
- Fix storytelling flow
- Remove unnecessary daily moments
📢 Marketing Videos
- Highlight product features in the right order
- Create strong call-to-action sequences
🎓 Educational Content
- Reorder steps for clarity
- Remove repeated explanations
Deleting vs Rearranging Clips (Comparison)
| Feature | Deleting Clips | Rearranging Clips |
|---|---|---|
| Purpose | Remove unwanted content | Improve story order |
| Impact | Reduces video length | Improves flow |
| Skill Level | Beginner | Beginner to Intermediate |
| Risk | Losing important content | Breaking story logic if careless |
Expert Insight
As a video editor with experience in timeline-based editing, one key principle always applies: editing is not about removing everything unnecessary, but about shaping the viewer’s journey.
In tools like Wondershare Filmora, the timeline is your storytelling canvas. Every deletion or rearrangement should serve a purpose—either clarity, emotion, or engagement.
For Further understanding Read:
- https://filmora.wondershare.com (official Filmora tutorials)
- https://www.adobe.com/creativecloud/video/discover/video-editing.html (video editing basics)
FAQs
1. How do I delete clips in Filmora quickly?
You can select a clip and press the Delete key or right-click and choose delete. Ripple delete is also useful for removing clips without leaving gaps.
2. Can I undo deleting a clip in Filmora?
Yes, press Ctrl + Z (Windows) or Cmd + Z (Mac) to undo any deletion immediately.
3. How do I rearrange multiple clips in Filmora?
Drag each clip to a new position on the timeline. You can also split clips and rearrange sections individually.
4. What is ripple delete in Filmora?
Ripple delete removes a clip and automatically closes the gap, keeping your timeline clean and continuous.
5. Why is rearranging clips important in video editing?
It helps improve storytelling, maintain viewer engagement, and create a logical flow in your video content.
H2: Conclusion
Mastering deleting and rearranging clips in Filmora is one of the most important steps in becoming a confident video editor. Once you understand how to remove unwanted footage and restructure your timeline, your videos instantly become more engaging and professional.
Whether you’re editing YouTube videos, business content, or personal projects, these skills help you shape stories that truly connect with viewers.
Start practicing on small projects, experiment with clip order, and refine your editing flow—you’ll notice a big difference in your results over time.











