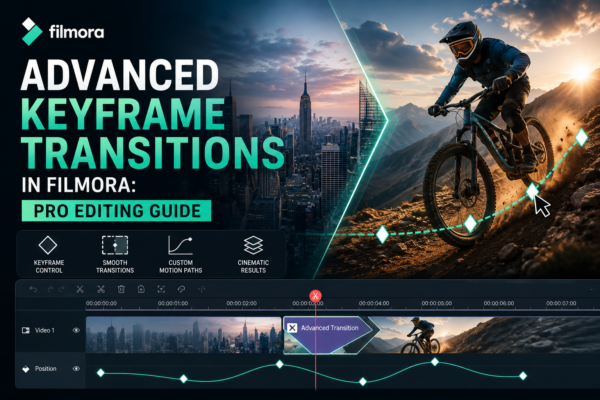
Video editing is no longer just about cutting and trimming clips. Today, audiences expect smooth, cinematic motion, dynamic storytelling, and visually engaging transitions. This is where advanced keyframe transitions in Filmora become a game-changer.
Whether you’re editing YouTube content, short films, reels, or corporate videos, mastering keyframes in Wondershare Filmora allows you to create professional-level motion effects without complex tools like After Effects.
In this guide, you’ll learn how to use advanced keyframe transitions in Filmora, real-world editing workflows, and pro techniques that elevate your content instantly.
Quick Answer
Advanced keyframe transitions in Filmora are animation techniques that use keyframes to control movement, scale, rotation, opacity, and effects over time.
They help you:
- Create smooth cinematic transitions
- Animate text, images, and videos
- Build motion storytelling effects
- Control speed and direction changes
- Enhance professional video quality without plugins
Simply put, keyframes let you “tell Filmora how your clip should move frame by frame.”
What Are Keyframe Transitions in Filmora?
Keyframe transitions are animation points placed on a timeline that define how a visual element changes over time.
In advanced keyframe transitions in Filmora, you can control:
- Position (X/Y movement)
- Scale (zoom in/out)
- Rotation (spin effects)
- Opacity (fade in/out)
- Motion paths (custom movement)
Instead of using preset transitions, you manually design how each clip behaves—giving you full creative control.
Why Use Advanced Keyframe Transitions in Filmora?
Unlike basic transitions, keyframe-based editing gives you precision and storytelling control.
Key Benefits:
- 🎬 Cinematic motion effects
- ⚡ Smooth professional transitions
- 🎯 Full customization of animations
- 🎥 Better storytelling flow
- 🚀 Stand out from basic edits
How to Create Advanced Keyframe Transitions in Filmora (Step-by-Step)
Step 1: Import Your Media
Open Filmora and import:
- Video clips
- Images
- Audio tracks
Drag them to the timeline.
Step 2: Select the Clip
Click on the clip where you want to apply advanced keyframe transitions in Filmora.
Go to:
- Video Panel → Animation or Transform settings
Step 3: Add Your First Keyframe
Set your starting point:
- Position: Left side
- Scale: 80%
- Opacity: 0–50%
Click the diamond icon to add a keyframe.
Step 4: Move Forward in Timeline
Now shift the playhead forward and change settings:
- Position: Center
- Scale: 100%
- Opacity: 100%
Filmora automatically creates a smooth transition between keyframes.
Step 5: Add Motion Enhancements
To make it more advanced:
- Add easing (smooth acceleration/deceleration)
- Combine rotation with zoom
- Use motion blur effects
- Adjust speed curves
Step 6: Preview and Adjust
Play the timeline and refine:
- Timing
- Smoothness
- Movement direction
Advanced Techniques for Keyframe Transitions in Filmora
1. Cinematic Zoom Transitions
Create a dramatic zoom-in effect between clips:
- Start at 80% scale
- End at 120% scale
- Add slight blur for realism
2. Sliding Motion Cuts
Simulate camera movement:
- Keyframe X-axis position
- Move clip from left to right or top to bottom
Perfect for vlog-style editing.
3. Text Animation with Keyframes
Animate titles like motion graphics:
- Fade-in + scale-up
- Bounce effects
- Rotating text entrances
4. Speed-Based Transitions
Combine keyframes with speed adjustments:
- Slow motion entry
- Fast exit transitions
5. Layered Motion Effects
Stack multiple elements:
- Background moves slowly
- Foreground moves faster
- Creates depth (parallax effect)
Use Cases of Advanced Keyframe Transitions in Filmora
1. YouTube Videos
- Smooth intro transitions
- Engaging jump cuts
2. Social Media Reels
- Fast-paced motion edits
- Trend-based storytelling
3. Business Presentations
- Professional slide animations
- Product showcases
4. Cinematic Storytelling
- Film-style movement
- Emotional pacing
Filmora Keyframe Transitions vs Preset Transitions
| Feature | Keyframe Transitions | Preset Transitions |
|---|---|---|
| Control | Full customization | Limited |
| Creativity | High | Medium |
| Learning Curve | Medium | Easy |
| Professional Quality | High | Basic |
Conclusion: Advanced keyframe transitions in Filmora give far more creative freedom than built-in transitions.
Pro Tips for Better Keyframe Editing
- Keep motion subtle for cinematic feel
- Don’t overuse zoom effects
- Use easing for natural movement
- Maintain consistent timing rhythm
- Combine audio beats with motion
Common Mistakes to Avoid
- Overloading too many keyframes
- Ignoring motion flow
- Using random scaling without purpose
- Not previewing transitions
FAQ – Advanced Keyframe Transitions in Filmora
1. What are keyframe transitions in Filmora?
They are animation points used to control movement, scale, and effects between two states in a video clip.
2. Are keyframe transitions better than preset transitions?
Yes, because they offer full customization and more professional cinematic control.
3. Do I need advanced skills to use keyframes in Filmora?
No, Filmora is beginner-friendly, but mastering keyframes requires practice.
4. Can I use keyframes for text animation?
Yes, you can animate text position, opacity, and scale using keyframes.
5. What is the best use of advanced keyframe transitions in Filmora?
They are best used for cinematic storytelling, YouTube videos, and professional motion graphics.
Conclusion
Mastering advanced keyframe transitions in Filmora unlocks a new level of creativity in video editing. Instead of relying on basic presets, you gain full control over motion, timing, and storytelling.
With consistent practice, you can turn simple clips into cinematic visuals that look professionally edited—even without expensive software.
If you’re serious about improving your editing skills, start experimenting with keyframes today inside Wondershare Filmora and build your own signature editing style.











