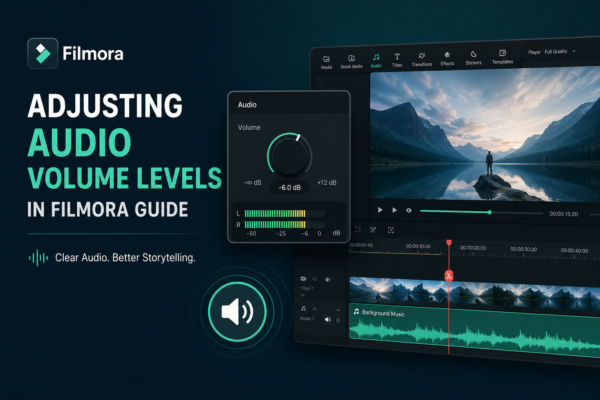
You can have stunning visuals, cinematic transitions, and perfect color grading—but if your audio is off, your entire video feels unprofessional. Many beginner editors overlook one crucial detail: audio balance. Whether you’re creating YouTube videos, reels, tutorials, or short films using Wondershare Filmora, controlling sound levels is essential for clarity and engagement. Poor audio can make even high-quality footage unwatchable, while well-balanced sound instantly elevates production value. In this guide, you’ll learn exactly how adjusting audio volume levels in Filmora works, when to use different methods, and how professionals achieve clean, balanced audio output.
Quick Answer: How to Adjust Audio Volume in Filmora
Adjusting audio volume levels in Filmora is done by selecting an audio clip or video timeline, then using the volume slider, audio keyframes, or advanced audio tools. You can increase, decrease, normalize, or fade audio to achieve balanced sound. This helps ensure dialogue, music, and effects blend smoothly without distortion or noise issues.
Understanding Audio Editing in Filmora
Before diving into steps, it’s important to understand what “audio volume adjustment” really means in Filmora.
In simple terms, adjusting audio volume levels in Filmora means controlling how loud or soft your audio clips are within the timeline. This includes:
- Increasing or decreasing overall clip volume
- Balancing background music and voiceover
- Removing harsh peaks or distortions
- Creating smooth audio transitions
Key Audio Tools in Filmora:
- Volume slider (basic control)
- Audio keyframes (advanced control)
- Audio normalization
- Audio ducking
- Audio gain adjustments
Each tool serves a specific purpose in achieving professional sound quality.
How to Adjust Audio Volume Levels in Filmora (Step-by-Step)
1. Basic Volume Adjustment Using Slider
This is the simplest way to start adjusting audio volume levels in Filmora.
Steps:
- Import your video or audio file into the timeline
- Click on the audio clip
- Locate the volume slider in the audio settings panel
- Drag left to decrease or right to increase volume
When to use:
- Quick fixes
- Beginner editing
- Simple voice or music adjustments
2. Adjusting Volume Using Audio Keyframes
If you want precise control, keyframes are your best friend.
What are audio keyframes?
They allow you to change volume at different points in a single clip.
Steps:
- Select the audio clip
- Enable keyframe tool
- Add keyframes where volume changes are needed
- Adjust volume between points
Example:
- Lower music during dialogue
- Increase sound during action scenes
This is a professional method widely used in Filmora audio editing workflows.
3. Using Audio Gain for Better Control
Audio gain allows you to adjust the overall strength of a clip before timeline mixing.
Steps:
- Right-click audio clip
- Select “Audio Settings”
- Adjust gain level
Why it matters:
- Prevents distortion
- Helps normalize uneven recordings
- Improves clarity for low-quality audio
4. Audio Normalization for Balanced Sound
When working with multiple clips, volume inconsistency becomes a problem. Audio normalization fixes that.
What it does:
It automatically balances loud and soft audio levels.
Best use cases:
- Podcast editing
- Interview videos
- Multi-source audio projects
This is one of the most efficient ways of adjusting audio volume levels in Filmora without manual editing.
5. Audio Ducking for Background Music Control
Audio ducking automatically lowers background music when speech is detected.
Steps:
- Select background music track
- Enable “Ducking” option
- Adjust sensitivity level
Why creators love it:
- Clean voice clarity
- No manual keyframing needed
- Professional podcast-style output
Real-World Example: Fixing Poor Audio Balance
Imagine you recorded a travel vlog. Your voice is too soft, but background wind and music are too loud.
Instead of re-recording:
- Increase voice volume using slider
- Apply audio normalization
- Use ducking for background music
- Fine-tune with keyframes
This combination transforms amateur audio into professional-grade output.
Best Practices for Adjusting Audio Volume Levels in Filmora
To get professional results, follow these expert tips:
1. Keep Dialogue Clear
Voice should always be the priority over background music.
2. Avoid Clipping
Never push volume into the red zone—it causes distortion.
3. Use Headphones While Editing
Speakers can mislead your perception of volume balance.
4. Maintain Consistent Audio Levels
Sudden volume jumps reduce viewer retention.
5. Combine Tools
Use sliders + keyframes + normalization together for best results.
Pros and Cons of Filmora Audio Controls
Pros:
- Easy-to-use interface
- Beginner-friendly tools
- Fast editing workflow
- Multiple audio adjustment methods
Cons:
- Limited advanced audio engineering tools
- Not as detailed as professional DAWs
- Requires manual tuning for complex projects
Despite limitations, Filmora is still powerful for content creators and YouTubers.
Use Cases of Audio Volume Adjustment in Filmora
Adjusting audio volume levels in Filmora is essential in many scenarios:
- YouTube video editing
- Educational tutorials
- Podcast production
- Social media reels
- Short films and documentaries
Each use case demands different audio balancing techniques.
FAQ: Adjusting Audio Volume Levels in Filmora
1. How do I increase volume in Filmora?
You can increase volume by selecting the audio clip and dragging the volume slider to the right or adjusting audio gain settings.
2. What is audio normalization in Filmora?
Audio normalization automatically balances loud and soft audio parts to create consistent sound levels across all clips.
3. Can I adjust background music separately in Filmora?
Yes, you can use audio ducking or keyframes to lower background music when voiceover is present.
4. Why is my audio distorted after increasing volume?
Distortion happens when volume exceeds safe levels (clipping). Always keep levels within a balanced range.
5. What is the best way to balance audio in Filmora?
The best method is combining volume sliders, keyframes, and normalization for professional-quality sound.
Conclusion: Mastering Audio Makes Your Videos Stand Out
Learning adjusting audio volume levels in Filmora is one of the most important editing skills for any content creator. Good visuals attract attention, but great audio keeps viewers engaged.
By using tools like volume sliders, keyframes, audio normalization, and ducking, you can transform simple recordings into polished, professional content.
If you’re serious about video editing, start experimenting with these audio techniques in your next project—and you’ll instantly notice the difference in quality.











