Video editing becomes much easier once you understand the Timeline in Filmora. If you’re new to video editing, you can first read our guide on what is Filmora and what you can create with it to understand the software before learning about the timeline https://youtubevideoeditingservices.com/what-is-filmora-video-editing-guide/ If you haven’t installed the software yet, you can follow our complete guide on how to download and install Filmora to get started with video editing https://youtubevideoeditingservices.com/how-to-install-filmora-windows-mac/
If you are new to Wondershare Filmora, the timeline might look like a simple strip at the bottom of the screen. In reality, it is the heart of the entire video editing process.
Every clip you cut, every transition you add, and every effect you apply is controlled from the timeline. Learning how to use it properly will help you edit videos faster and create professional-quality content.
In this beginner-friendly guide, you’ll learn what the Timeline in Filmora is, how it works, and how to use it effectively when editing videos.
Quick Answer: What is the Timeline in Filmora?
The Timeline in Filmora is the main workspace where you arrange video clips, audio tracks, images, transitions, and effects in chronological order. It allows editors to trim clips, add layers, adjust timing, and synchronize audio with visuals. Mastering the timeline helps you create smooth, professional video edits efficiently.
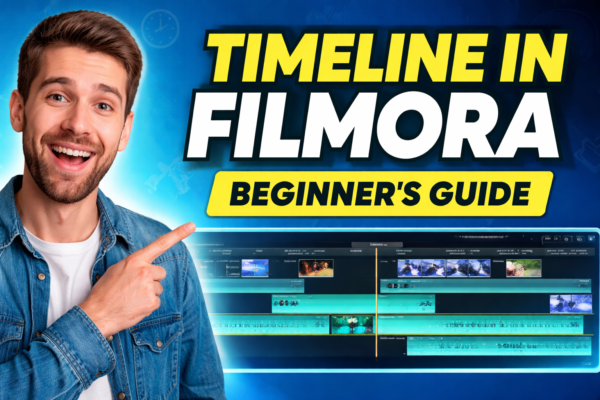
What is the Timeline in Filmora?
The Timeline in Filmora is the section located at the bottom of the editing interface where all media elements are placed and arranged. It acts like a visual storyboard of your video project. f you want to explore advanced timeline features such as track management, auto ripple, and playhead control, you can check the official Filmora timeline management tutorial by Wondershare. https://filmora.wondershare.com/tutorial/manage-timeline.html
Think of it like building a movie scene by scene:
- The beginning of your video starts on the left side
- The end of the video appears on the right
- Each element sits on a track where it can be edited
Inside the timeline, you can add:
- Video clips
- Audio tracks
- Images
- Text and titles
- Transitions
- Filters and effects
- Stickers and overlays
This makes the timeline the central control area of the Filmora video editor.
Why the Timeline is Important in Video Editing
Understanding the Timeline in Filmora is essential because every editing action happens here.
Here’s why it matters:
Organizes Your Video Project
The timeline keeps your clips in order so your story flows smoothly.
Allows Precise Editing
You can trim clips frame-by-frame to remove mistakes or unwanted parts.
Controls Layers
You can stack videos, overlays, and effects on different tracks.
Synchronizes Audio and Video
Voiceovers, background music, and sound effects can be aligned perfectly.
Helps Create Professional Edits
Advanced edits like transitions, animations, and split screens depend on timeline control.
In short, the better you understand the timeline, the better your videos will look.
Main Elements of the Timeline in Filmora
To use the Timeline in Filmora effectively, you need to understand its key components.
Tracks
Tracks are horizontal layers where media files are placed.
Common tracks include:
- Video Track – holds video clips and images
- Audio Track – contains music or sound effects
- Text Track – titles, subtitles, captions
- Overlay Track – graphics and visual elements
You can add multiple tracks to create complex video edits.
Example:
Track 1 – Main video
Track 2 – Background music
Track 3 – Text overlay
Playhead
The playhead is the vertical line that moves across the timeline.
It shows the current frame you are viewing or editing.
You can:
- Drag it to preview specific moments
- Use it to trim clips precisely
- Align effects or transitions
Professional editors often use the playhead to synchronize sound with visuals.
Timeline Ruler
The ruler at the top of the timeline shows time measurements.
It displays:
- Seconds
- Frames
- Total duration of the video
This helps editors maintain accurate timing when cutting or adding clips.
Clips
Clips are the video or audio files placed on the timeline.
Each clip can be:
- Trimmed
- Split
- Moved
- Copied
- Deleted
Clips can also contain effects, filters, and color adjustments.
Zoom Controls
Zoom controls allow you to zoom in or out of the timeline.
This helps with:
- Frame-level editing
- Detailed trimming
- Precise cuts
Zooming in gives you more control when editing small sections of video.
How to Use the Timeline in Filmora (Step-by-Step)
If you’re editing your first video, here’s a simple workflow for using the Timeline in Filmora.
Step 1: Import Your Media
Open Filmora and import:
- Videos
- Images
- Music
- Sound effects
Drag these files into the media library.
Step 2: Add Clips to the Timeline
Drag your video clips from the media library to the timeline.
Arrange them in the order you want your video to appear.
Example:
Intro → Main content → Ending
Step 3: Trim Unwanted Parts
Select a clip and drag its edges to shorten it.
You can also:
- Use the split tool
- Delete mistakes
- Cut long pauses
This keeps your video clean and engaging.
Step 4: Add Transitions
To create smooth scene changes:
- Open the Transitions tab
- Drag a transition between two clips
- Adjust its duration
Transitions make your video look more professional and cinematic.
Step 5: Add Audio and Effects
Use the timeline to add:
- Background music
- Sound effects
- Titles
- Filters
- Animations
Each element can be placed on a separate track for better control.
Practical Example: Editing a YouTube Video
Let’s imagine you are creating a YouTube tutorial.
Your timeline might look like this:
Track 1 (Video)
Intro clip → Tutorial explanation → Ending scene
Track 2 (Audio)
Background music
Track 3 (Text)
Title → Section headings → Subscribe message
This layered approach makes your video more dynamic and professional.
Best Tips for Using the Timeline in Filmora
Here are some expert tips to improve your editing workflow.
Use multiple tracks to separate audio, text, and video for better organization.
Zoom into the timeline when cutting clips to ensure accurate edits.
Keep your timeline organized by arranging clips neatly and labeling tracks.
Use markers to highlight important points in the timeline.
Save your project frequently to avoid losing work.
Common Mistakes Beginners Make
When learning the Timeline in Filmora, beginners often make these mistakes.
Overlapping clips incorrectly, which hides clips on lower tracks.
Ignoring audio levels so background music becomes louder than dialogue.
Adding too many effects that make the video look unprofessional.
Poor clip timing that reduces viewer engagement.
Avoiding these mistakes will help your videos look more polished and professional.
Timeline in Filmora vs Traditional Video Editors
Filmora Timeline is beginner-friendly and easy to use.
Professional editors like Premiere Pro and Final Cut Pro offer more advanced timeline tools but have a steeper learning curve.
Filmora is ideal for beginners, YouTubers, and content creators who want fast editing without complicated software.
FAQs About Timeline in Filmora
Where is the Timeline in Filmora located?
The Timeline in Filmora is located at the bottom of the editing interface. It displays all clips, audio tracks, and effects arranged in chronological order.
How many tracks can you add in Filmora?
Filmora allows you to add multiple video and audio tracks depending on your editing needs.
Can you edit audio in the Filmora timeline?
Yes. You can trim, split, adjust volume, and apply audio effects directly inside the timeline.
How do you zoom in on the timeline?
You can zoom in using the timeline zoom slider or keyboard shortcuts to perform detailed edits.
Why is the timeline important in video editing?
The timeline is important because it allows editors to organize clips, control timing, add effects, and synchronize audio with video.
Conclusion
The Timeline in Filmora is the foundation of video editing in Wondershare Filmora. It allows you to organize clips, control timing, add effects, and build your entire video project from start to finish.
Once you understand how tracks, clips, and the playhead work together, editing becomes faster and more intuitive.
Whether you are creating YouTube videos, tutorials, marketing content, or social media clips, mastering the timeline will help you produce cleaner and more professional videos.
Practicing with the timeline regularly is the best way to improve your video editing skills and create high-quality content.