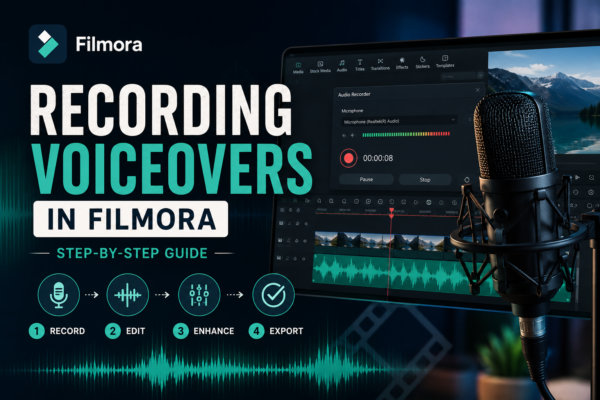
Recording voiceovers in Filmora is simple using its built-in voiceover tool. You just open the audio tab, select “Record Voiceover,” adjust your microphone settings, and start speaking while previewing your timeline. It’s ideal for YouTube videos, tutorials, and presentations, offering real-time syncing and easy editing options afterward.
Why Voiceovers Matter in Video Editing
A great video without clear narration often feels incomplete. Whether you’re creating YouTube tutorials, business presentations, or cinematic edits, voiceovers add clarity, emotion, and personality to your content.
Modern editing tools like Filmora have made this process extremely simple. You don’t need expensive recording studios or advanced technical skills. With just a microphone and the right settings, you can create professional-quality narration directly inside your editing timeline.
In this guide, you’ll learn exactly how to record voiceovers in Filmora, optimize audio quality, and avoid common mistakes that beginners make.
What Is Voiceover Recording in Filmora?
Voiceover recording in Filmora refers to the process of capturing your voice directly inside the video editor while syncing it with your timeline.
Instead of recording audio separately and importing it later, Filmora allows you to:
- Record narration in real-time
- Sync voice with video clips
- Edit audio directly on the timeline
- Add effects like noise reduction and fade-in/out
This makes it ideal for content creators, educators, marketers, and vloggers who need fast and efficient audio production.
How to Record Voiceovers in Filmora (Step-by-Step Guide)
Here is a simple, practical workflow to help you record voiceovers like a pro:
1: Open Your Project
- Launch Filmora and import your video clips.
- Drag them to the timeline where you want narration.
2: Connect a Microphone
- Use a good-quality external microphone if possible.
- Check system audio settings before recording.
3: Access Voiceover Tool
- Go to the Audio Tab
- Click on Record Voiceover
4: Configure Settings
Before recording, adjust:
- Input device (microphone selection)
- Volume levels
- Playback monitoring (optional)
5: Start Recording
- Position the playhead where narration should begin.
- Click the record button.
- Speak clearly and steadily while the video plays.
6: Stop and Edit
- Click stop when done.
- The audio clip automatically appears on the timeline.
- Trim, move, or enhance it as needed.
Best Practices for High-Quality Voiceovers
To make your narration sound professional, follow these expert-level techniques:
1. Use a Quiet Environment
Background noise is the biggest issue in beginner recordings. Choose a quiet room or use noise isolation.
2. Speak Clearly and Naturally
Avoid robotic delivery. Imagine you are explaining something to a friend.
3. Maintain Consistent Distance
Keep your mouth at a fixed distance from the microphone to avoid volume fluctuations.
4. Use Audio Enhancements
Filmora offers tools like:
- Noise reduction
- Equalizer adjustments
- Audio fade effects
5. Do Multiple Takes
Don’t hesitate to re-record sections. Even professionals do retakes for perfection.
Use Cases of Voiceover Recording in Filmora
Voiceovers are widely used across different industries. Here are some real-world applications:
🎬 YouTube Content Creation
Creators use voiceovers for:
- Tutorials
- Reviews
- Commentary videos
📊 Business Presentations
- Product demos
- Training videos
- Marketing explainers
🎓 Educational Content
- Online courses
- Lecture recordings
- E-learning modules
🎥 Cinematic Storytelling
- Documentary narration
- Short films
- Travel vlogs
Pros and Cons of Recording Voiceovers in Filmora
✅ Advantages
- Easy built-in recording feature
- No need for external software
- Direct timeline synchronization
- Beginner-friendly interface
❌ Limitations
- Basic audio editing compared to professional DAWs
- Depends on system microphone quality
- Limited advanced sound engineering tools
Filmora vs External Audio Tools (Quick Comparison)
| Feature | Filmora Voiceover | External Audio Software |
|---|---|---|
| Ease of Use | Very Easy | Moderate to Advanced |
| Editing Control | Basic | Advanced |
| Integration | Direct Timeline | Requires Import |
| Best For | Beginners & Creators | Professional Audio Engineers |
If your focus is video content creation, Filmora is more than enough. However, for studio-level audio production, external tools may offer more control.
Expert Tips for Better Voiceovers
As a video editor, here are some practical insights:
- Write a script before recording to avoid mistakes
- Use pop filters to reduce harsh sounds
- Normalize audio levels after recording
- Avoid long pauses unless intentional
- Test microphone before final recording
These small adjustments can significantly improve your final output quality.
Common Mistakes to Avoid
Many beginners struggle with voiceover quality due to simple mistakes:
- Recording in noisy environments
- Speaking too fast or unclear
- Ignoring microphone settings
- Not syncing properly with video
- Overusing background music over voice
Fixing these can instantly improve your production value.
Internal & External Linking Suggestions
Internal Links (for your blog/website)
- Filmora video editing basics guide
- How to add background music in Filmora
- Best export settings in Filmora
External Authority References
- Filmora Official Support: https://filmora.wondershare.com
- Adobe Audio Best Practices: https://www.adobe.com/creativecloud/video/discover/audio-editing.html
Frequently Asked Questions (FAQ)
1. How do I record voiceovers in Filmora?
You can record voiceovers using the “Record Voiceover” option in the Audio tab. Simply select your microphone, place the playhead, and start recording directly on the timeline.
2. Can I edit voiceovers after recording in Filmora?
Yes, you can trim, move, adjust volume, and apply effects like noise reduction and fade-in/out directly in the timeline.
3. What microphone is best for Filmora voiceovers?
A USB condenser microphone is ideal for beginners. It provides clear audio without requiring complex setup.
4. Why is my Filmora voiceover audio low quality?
Common reasons include background noise, poor microphone placement, or incorrect input settings. Adjusting these usually fixes the issue.
5. Can I re-record voiceovers in Filmora?
Yes, you can easily delete and re-record voiceovers anytime without affecting your video clips.
Conclusion: Master Voiceovers Like a Pro
Recording voiceovers in Filmora is one of the simplest yet most powerful ways to improve your video content. With just a few clicks, you can transform silent clips into engaging, professional-quality videos.
Whether you’re a beginner or an experienced editor, mastering this feature helps you create more engaging storytelling, better tutorials, and stronger audience connection.
If you consistently apply the techniques shared above—clear speech, proper setup, and smart editing—you’ll quickly notice a significant improvement in your video production quality.
Start experimenting today and turn your videos into professional-level content with confidence.











