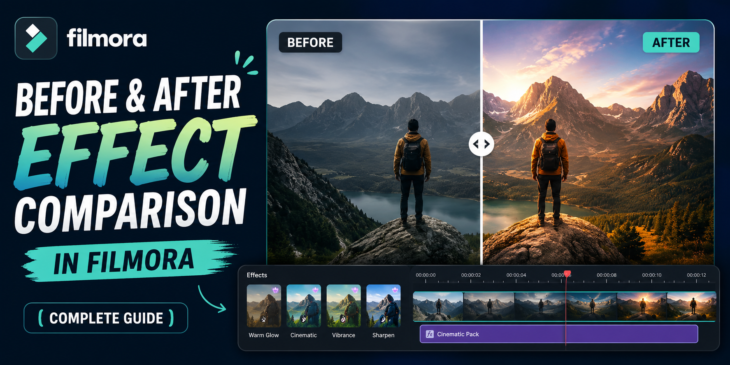
Ever watched a video where the transformation instantly grabs your attention—like a dull clip turning cinematic in seconds? That’s the power of a before & after effect comparison in Filmora.
If you’re creating YouTube videos, client projects, or social media content, simply applying effects isn’t enough. You need to show the difference clearly. In this guide, you’ll learn how to create compelling before-and-after comparisons in Filmora that not only look professional but also boost engagement and credibility.
Quick Answer
A before & after effect comparison in Filmora is a technique used to visually display the difference between original footage and edited footage. You can create it using split screens, masking, or side-by-side clips to highlight transformations like color grading, filters, or enhancements—making your edits more impactful and easier for viewers to understand.
What is Before & After Effect Comparison in Filmora?
A before-and-after comparison is a visual storytelling method where two versions of the same clip are shown:
- Before: Raw, unedited footage
- After: Enhanced or edited version
This technique is widely used in:
- Video editing tutorials
- Product promotions
- Real estate videos
- Social media transformations
- Client showcase reels
In Filmora, you can achieve this using built-in tools like split screen, masking, and keyframes—without needing advanced editing skills.
Why Use Before & After Comparisons?
1. Instantly Show Value
Instead of telling viewers your edits are good, you prove it visually.
2. Boost Engagement
Transformation videos naturally attract attention, especially on platforms like YouTube and TikTok.
3. Build Trust (EEAT)
Showing real results increases credibility, especially for freelancers and creators.
4. Improve Learning
If you’re teaching editing, comparisons make concepts easier to understand.
How to Create Before & After Effect Comparison in Filmora
Let’s walk through a practical step-by-step method.
1: Import Your Clip
- Open Filmora
- Import your video into the media library
- Drag it to the timeline
2: Duplicate the Clip
- Copy and paste the same clip onto a second track
- Top track = “After” (edited version)
- Bottom track = “Before” (original)
3: Apply Effects to the Top Layer
- Add filters, LUTs, color grading, or adjustments
- This becomes your “After” version
4: Create the Comparison
A: Split Screen (Simple)
- Use Filmora’s split-screen feature
- Place before on one side, after on the other
B: Masking (Professional Look)
- Select the top clip
- Apply a mask (half-screen or custom shape)
- Adjust feathering for smooth blending
C: Slider Effect (Advanced)
- Animate a mask using keyframes
- Create a moving “wipe” that reveals before vs after
5: Add Labels
- Add text like “Before” and “After”
- Keep it clean and readable
6: Export Your Video
- Choose high quality (1080p or 4K)
- Optimize for your platform
Best Practices for Professional Results
Keep It Clear
Avoid clutter. The difference should be obvious at first glance.
Use Subtle Animations
Smooth transitions make comparisons more engaging.
Match Timing
Ensure both clips are perfectly synced.
Highlight Key Changes
Focus on:
- Color correction
- Lighting improvements
- Sharpness and clarity
Real-World Example
Imagine you’re editing a travel vlog:
- Before: Flat, washed-out beach footage
- After: Vibrant colors, enhanced sky, warm tones
By placing them side-by-side or using a slider, viewers instantly see the transformation. This not only improves your content but also showcases your editing skills.
Comparison Techniques in Filmora (Pros & Cons)
1. Split Screen
Pros:
- Easy to use
- Fast setup
Cons:
- Less dynamic
- Can feel basic
2. Masking
Pros:
- Professional look
- Customizable
Cons:
- Slight learning curve
3. Animated Slider
Pros:
- Highly engaging
- Modern style
Cons:
- Requires keyframing skills
Use Cases for Before & After Effects
Content Creators
Show editing skills and attract subscribers.
Freelancers
Demonstrate value to clients with visual proof.
Brands
Highlight product transformations (e.g., skincare, interiors).
Educators
Teach editing techniques more effectively.
Frequently Asked Questions (FAQ)
1. What is a before & after effect comparison in Filmora?
It’s a technique that shows the original and edited versions of a video side-by-side or through transitions to highlight improvements.
2. How do I split screen in Filmora?
Go to the split-screen tab, choose a layout, and drag your clips into the placeholders.
3. Can I animate before and after comparisons?
Yes, you can use keyframes and masking to create a sliding comparison effect.
4. Which method is best for beginners?
Split screen is the easiest, while masking offers more professional results.
5. Why is before & after editing important?
It helps viewers clearly see improvements, builds trust, and increases engagement.
Pro Tips from an Editing Expert
- Always color match exposure before applying creative effects
- Use adjustment layers for consistent edits
- Don’t over-edit—natural results perform better
- Keep transitions under 1–2 seconds for better pacing
Conclusion: Turn Simple Edits into Powerful Visual Stories
Mastering before & after effect comparison in Filmora isn’t just about technique—it’s about storytelling. When you show transformation clearly, you make your content more engaging, more professional, and more persuasive.
Whether you’re a beginner or a growing creator, this technique can instantly elevate your videos.
Now it’s your turn:
Open Filmora, try a simple split-screen comparison, and watch how your edits come to life.











